Getting Started
Prerequisites
- This guide assumes that you have properly configured all environment settings and services
- Ensure the Appium CLI is installed and available in your PATH (default local server starts on http://localhost:4723)
- Ensure S3 storage is configured for recordings and audio playback:
- Buckets:
recordingsandaudio(AWS S3 or MinIO) - Keys in
server/.env:S3_ACCESS_KEY,S3_SECRET_KEY,S3_ENDPOINT,S3_RECORDINGS_BUCKET_NAME,S3_AUDIO_BUCKET_NAME,S3_REGION,S3_USE_PATH_STYLE
- Buckets:
- For Verify Screen steps: Ollama must be installed and configured:
- Install Ollama from https://ollama.ai
- Pull a vision-capable model (e.g.,
ollama pull llava) - Configure in
server/.env:OLLAMA_BASE_URLandOLLAMA_MODEL_ID - See Supported Steps - Ollama Configuration for details
Accessing the Web App
- Open your web browser
- Go to http://localhost:8080
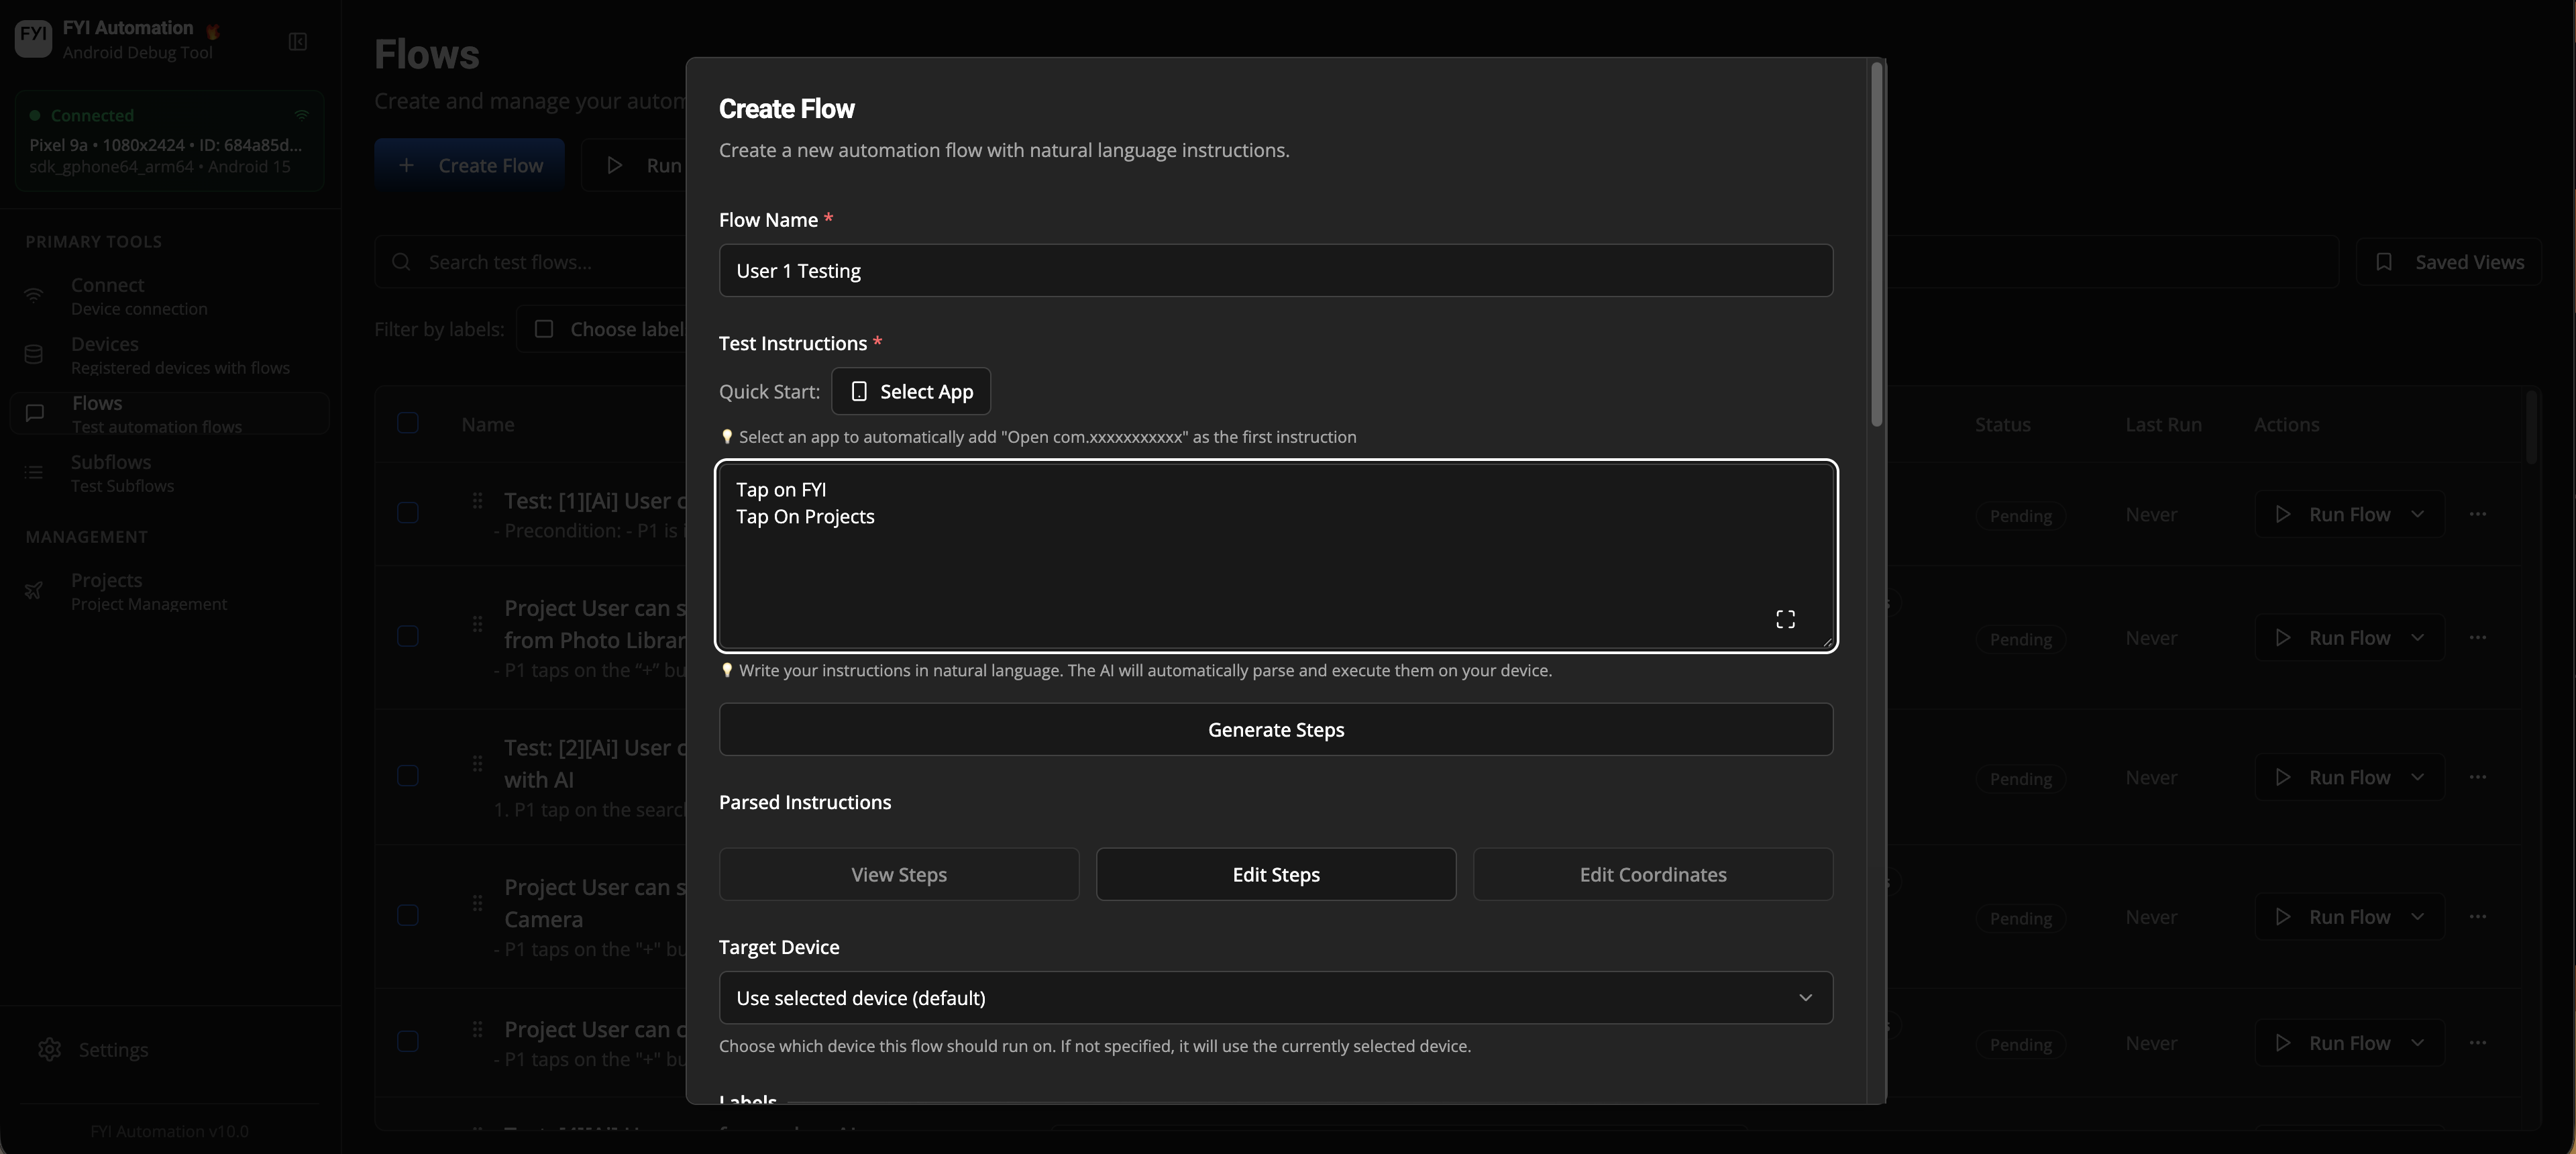
Creating flows
- Go to http://localhost:8080/flows
- Press create flow
- Enter the following fields
- Flow Name
- Test instructions
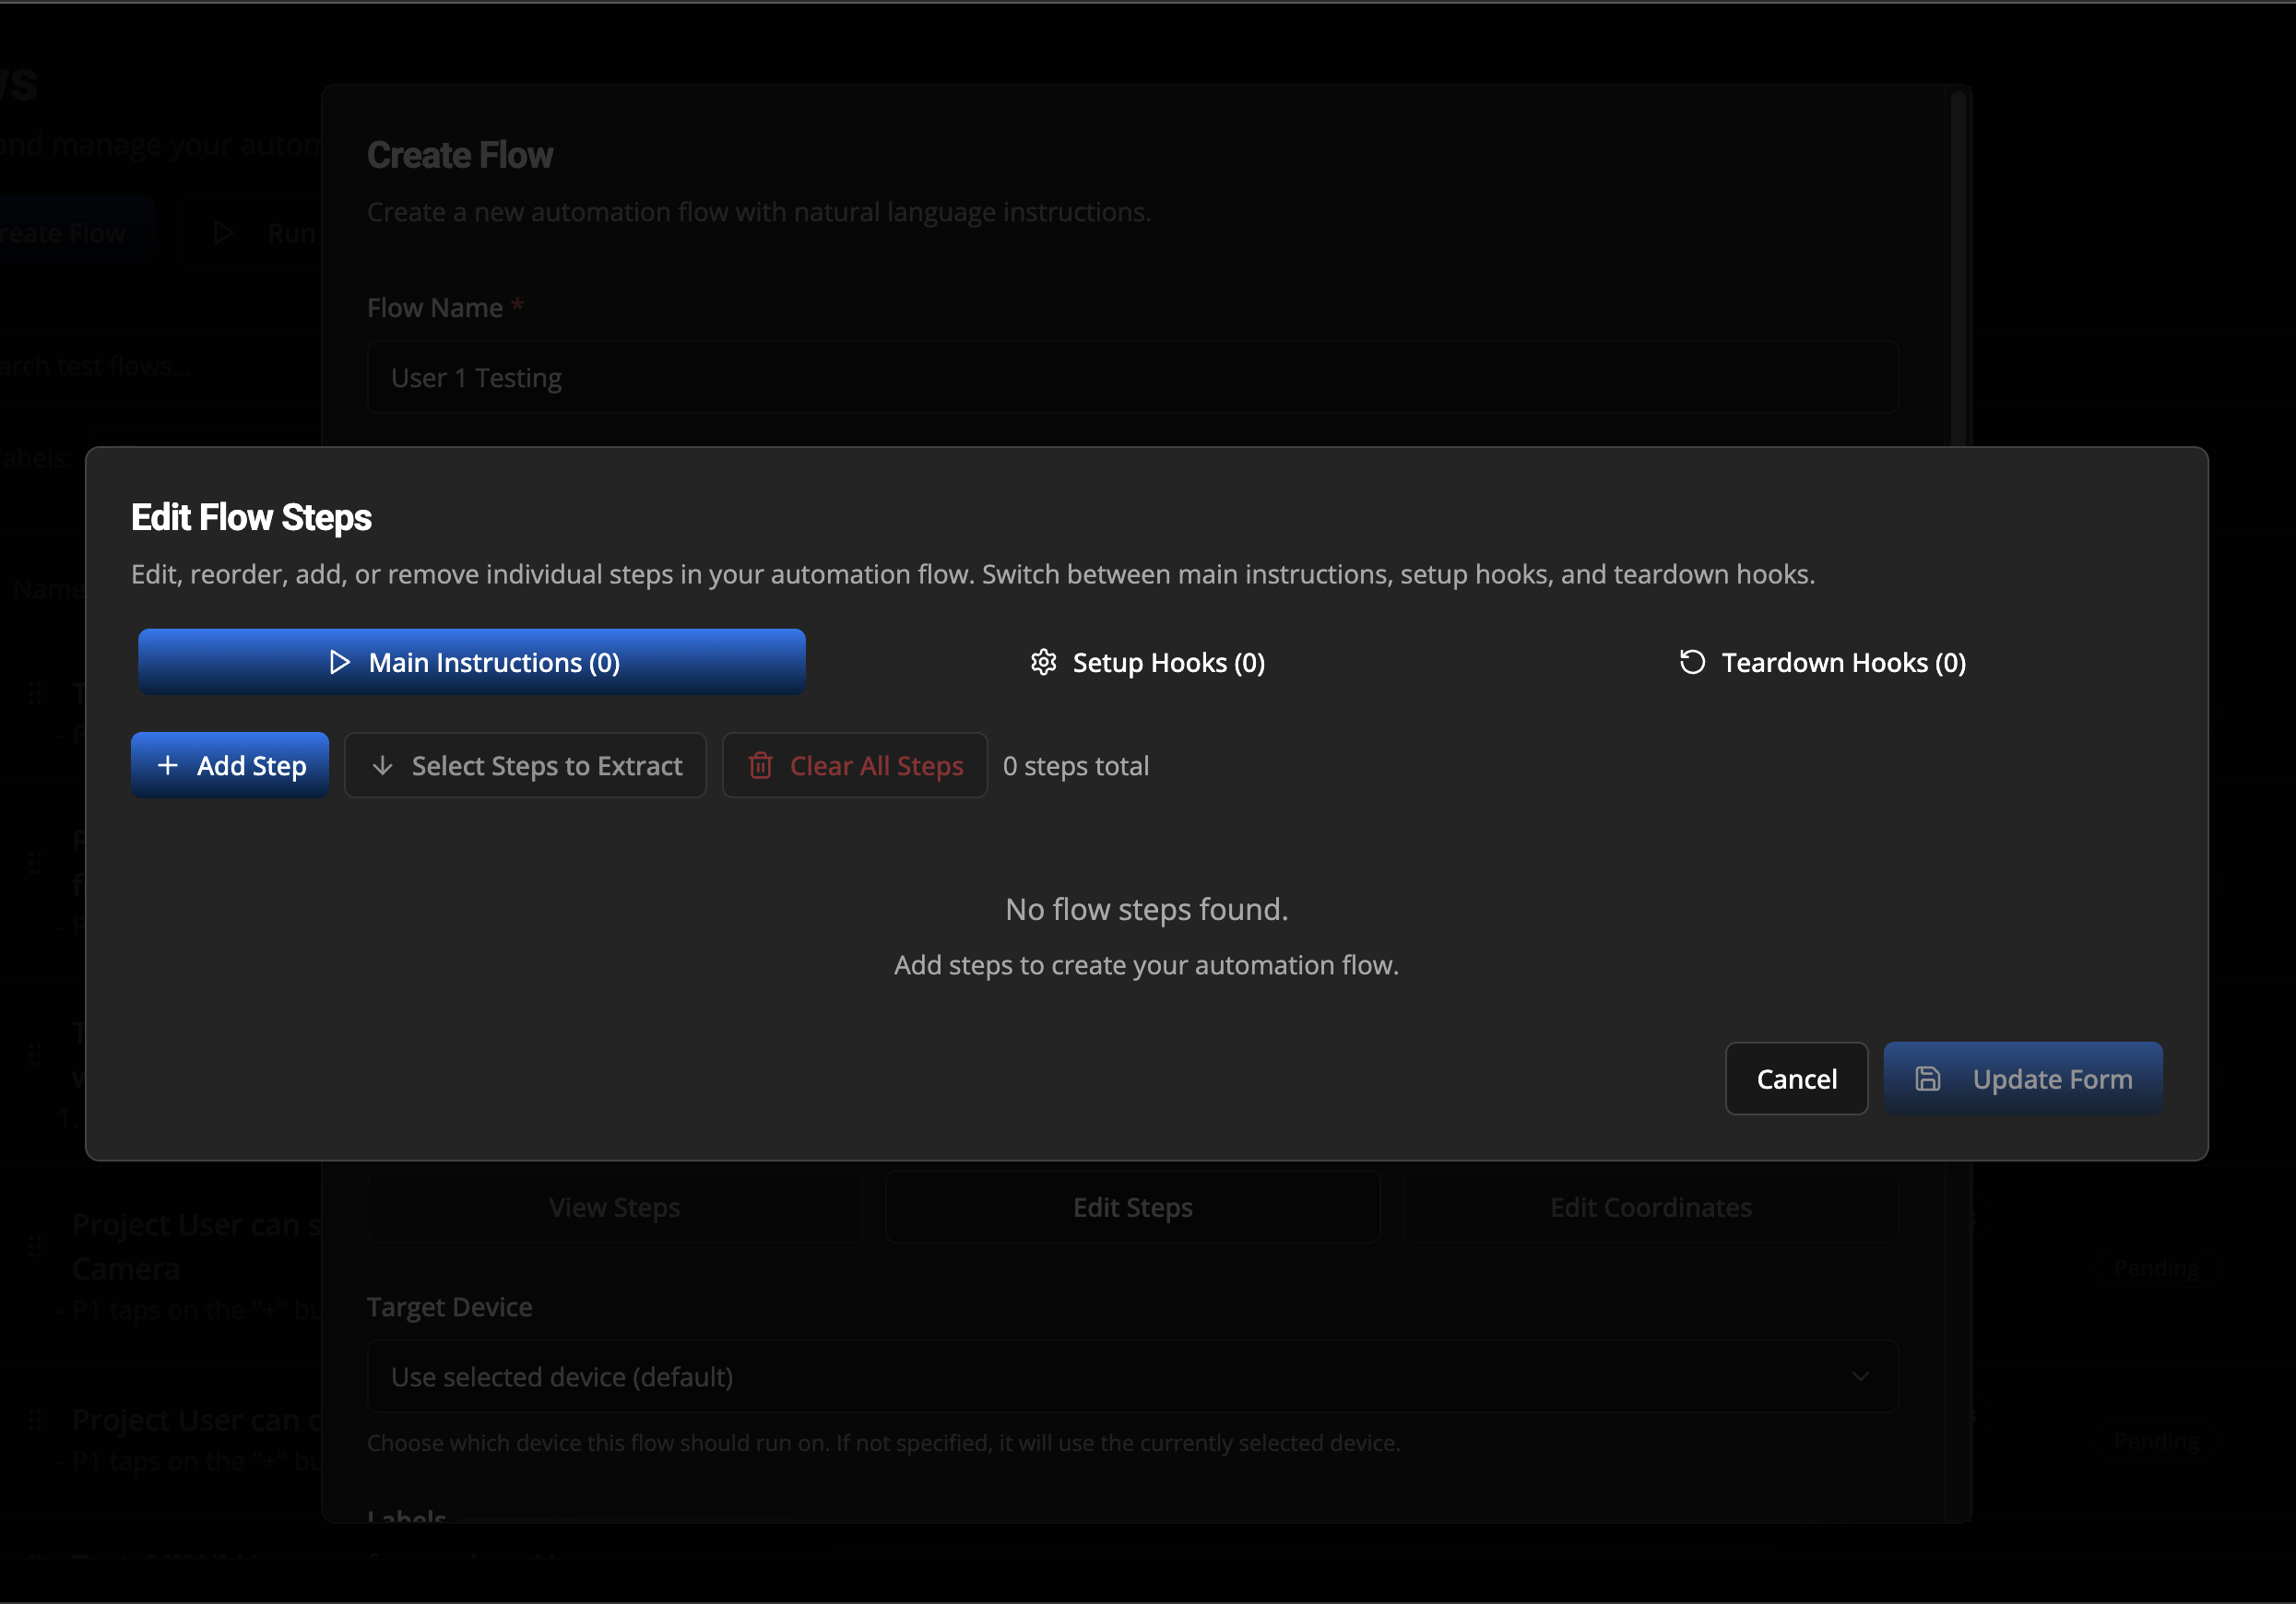
Creating steps
Use the step editor to create steps for your flow.
- Using the edit steps button you can easily do the following:
- Add steps
- Edit steps
- Re-arrange steps
- Play steps for debugging
Supported Steps
For a complete list of all available action types you can use when creating flows, see the Supported Steps page.
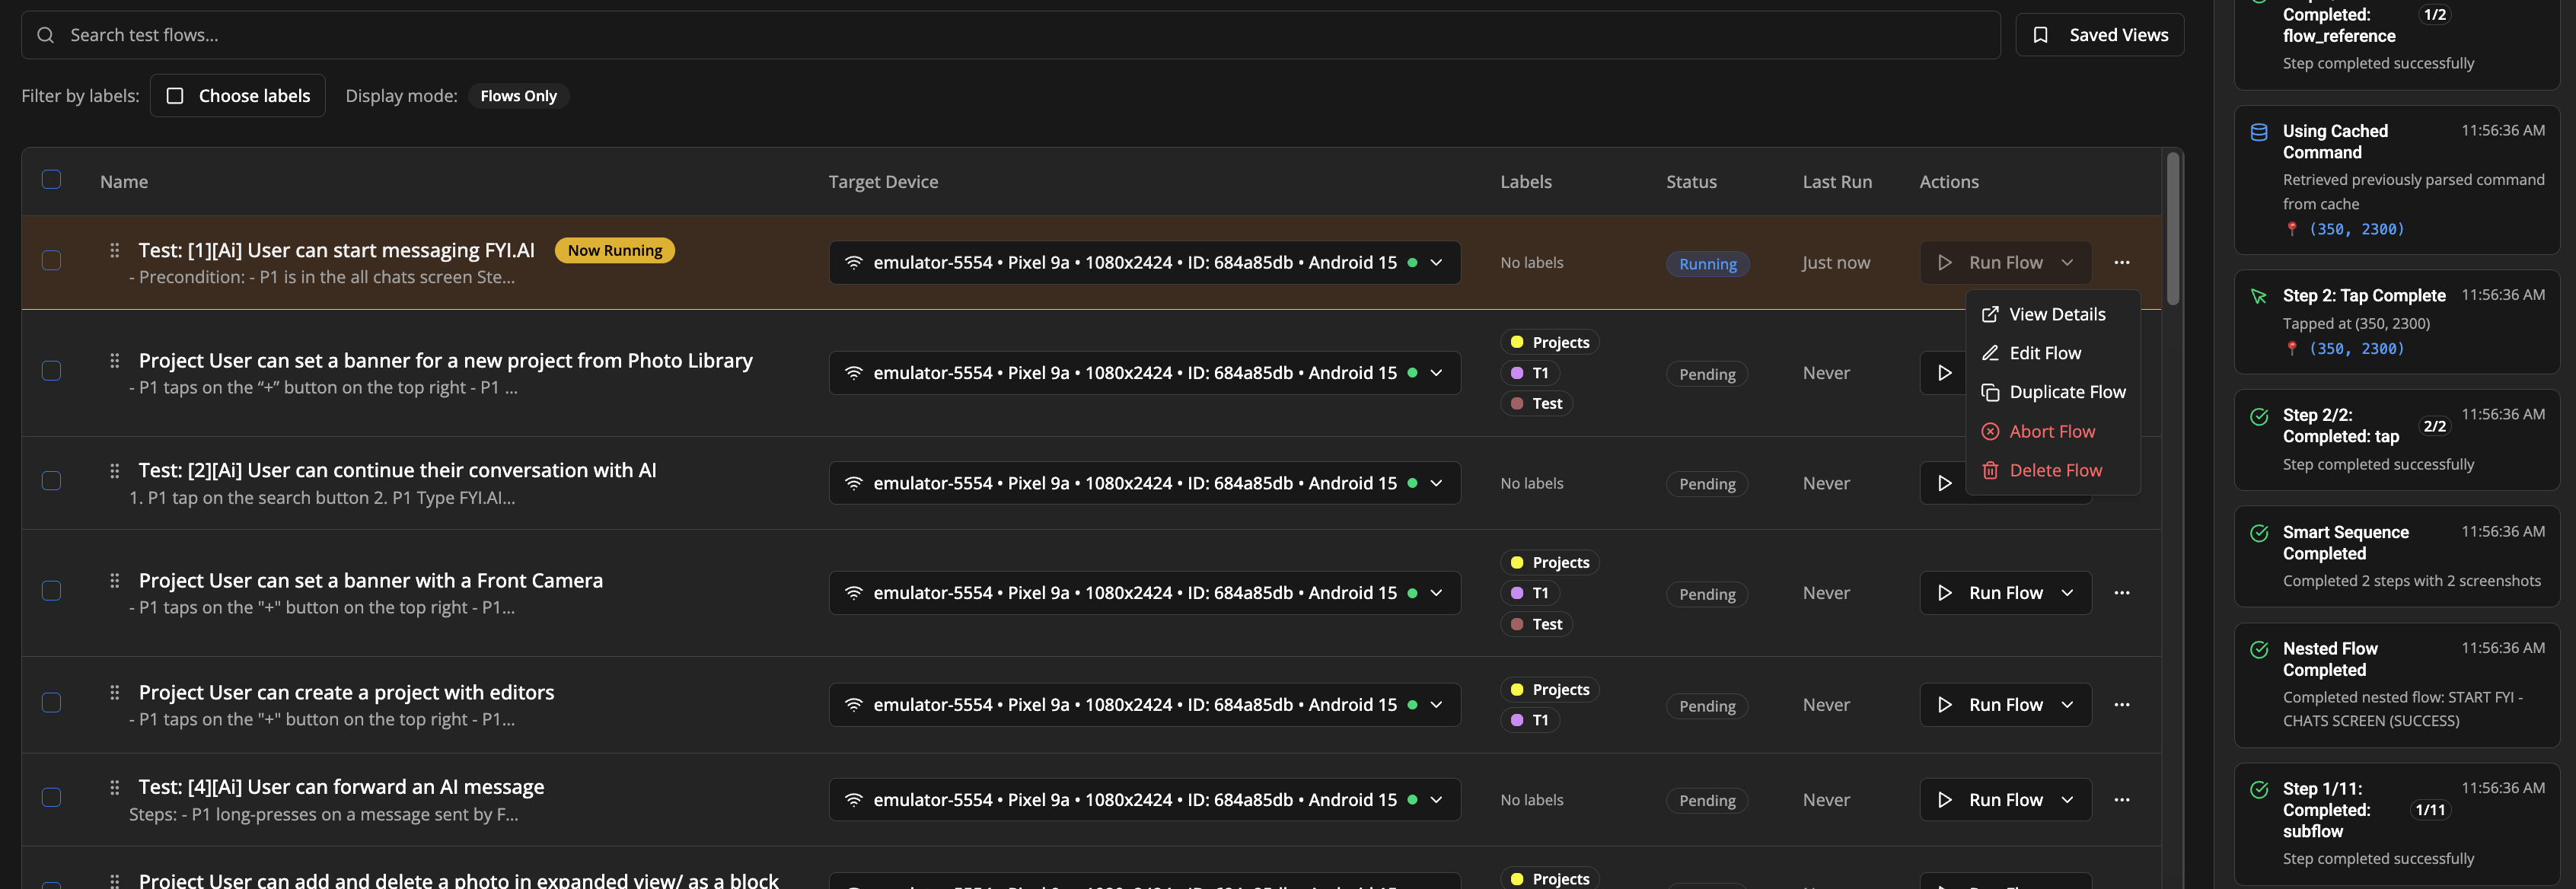
Running Flows
Once you have created flows, you can run them using the flow management interface.
Prerequisites for Running Flows
Before running a flow, ensure you have:
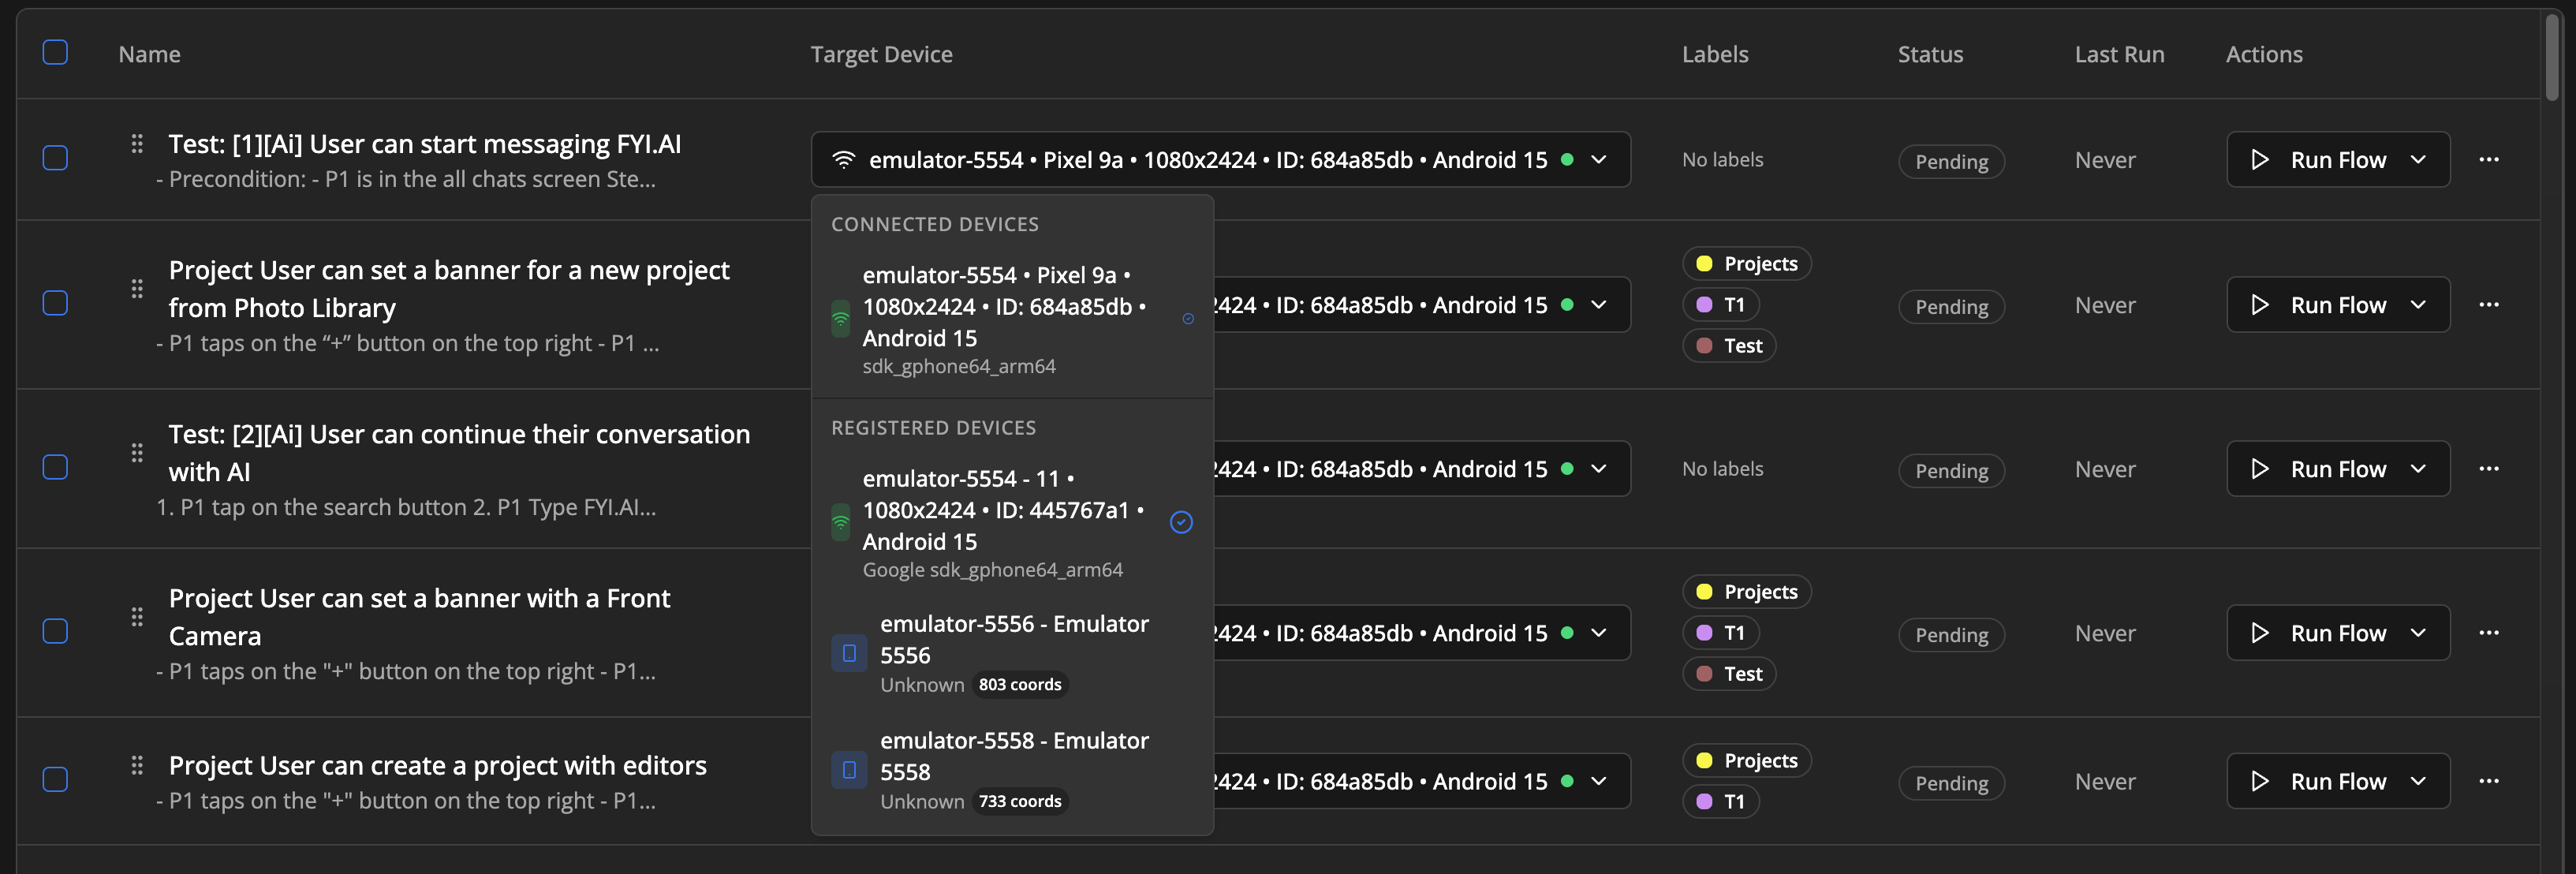
- At least one device connected to the system
- Selected a target device for the flow (if not already set)
- An Appium server running or reachable (autostart uses http://localhost:4723 when
APPIUM_AUTOSTART=true) - S3 buckets reachable for recording uploads and audio fetches
- If your flow uses Verify Screen steps: Ollama service must be running and properly configured (see Prerequisites above)
- The flow is not currently running
How to Run a Flow
- Navigate to the Flows page at
http://localhost:8080/flows - Locate your flow in the flows table
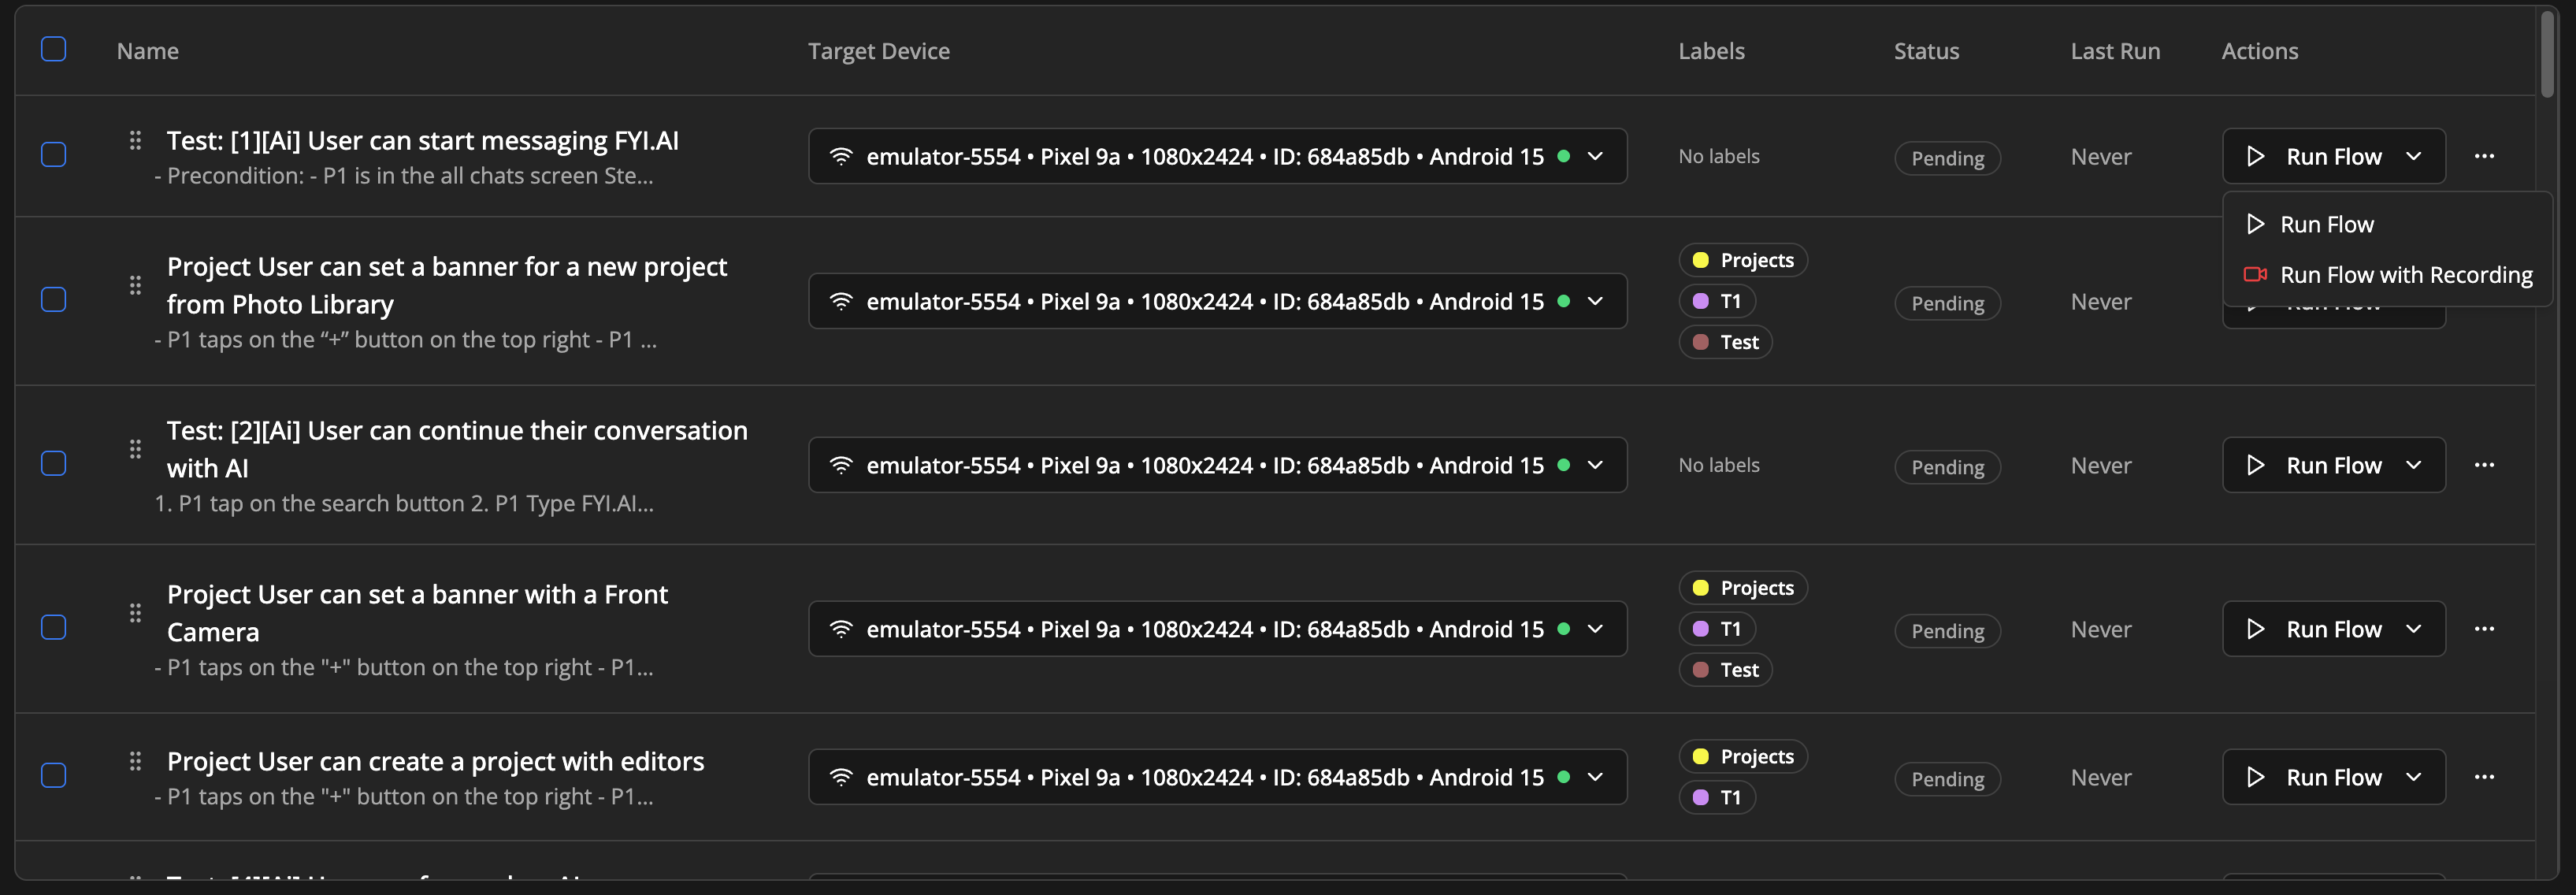
- Click the "Run Flow" dropdown button in the Actions column
- Choose your execution option:
- Run Flow - Execute the flow normally
- Run Flow with Recording - Execute the flow and record the screen activity
Flow Execution States
-
Ready to Run - Green "Run Flow" button is enabled
-
Running - Row shows yellow background with "Now Running" badge and pulsing animation
-
Cannot Run - Button is disabled when:
- No devices are connected
- Target device is not available
- Another flow is already running
During Execution
While a flow is running:
- The flow row will be highlighted in yellow
- A "Now Running" badge appears next to the flow name
- You can abort the running flow using the dropdown menu → "Abort Flow"
- Other flows cannot be started until the current one completes
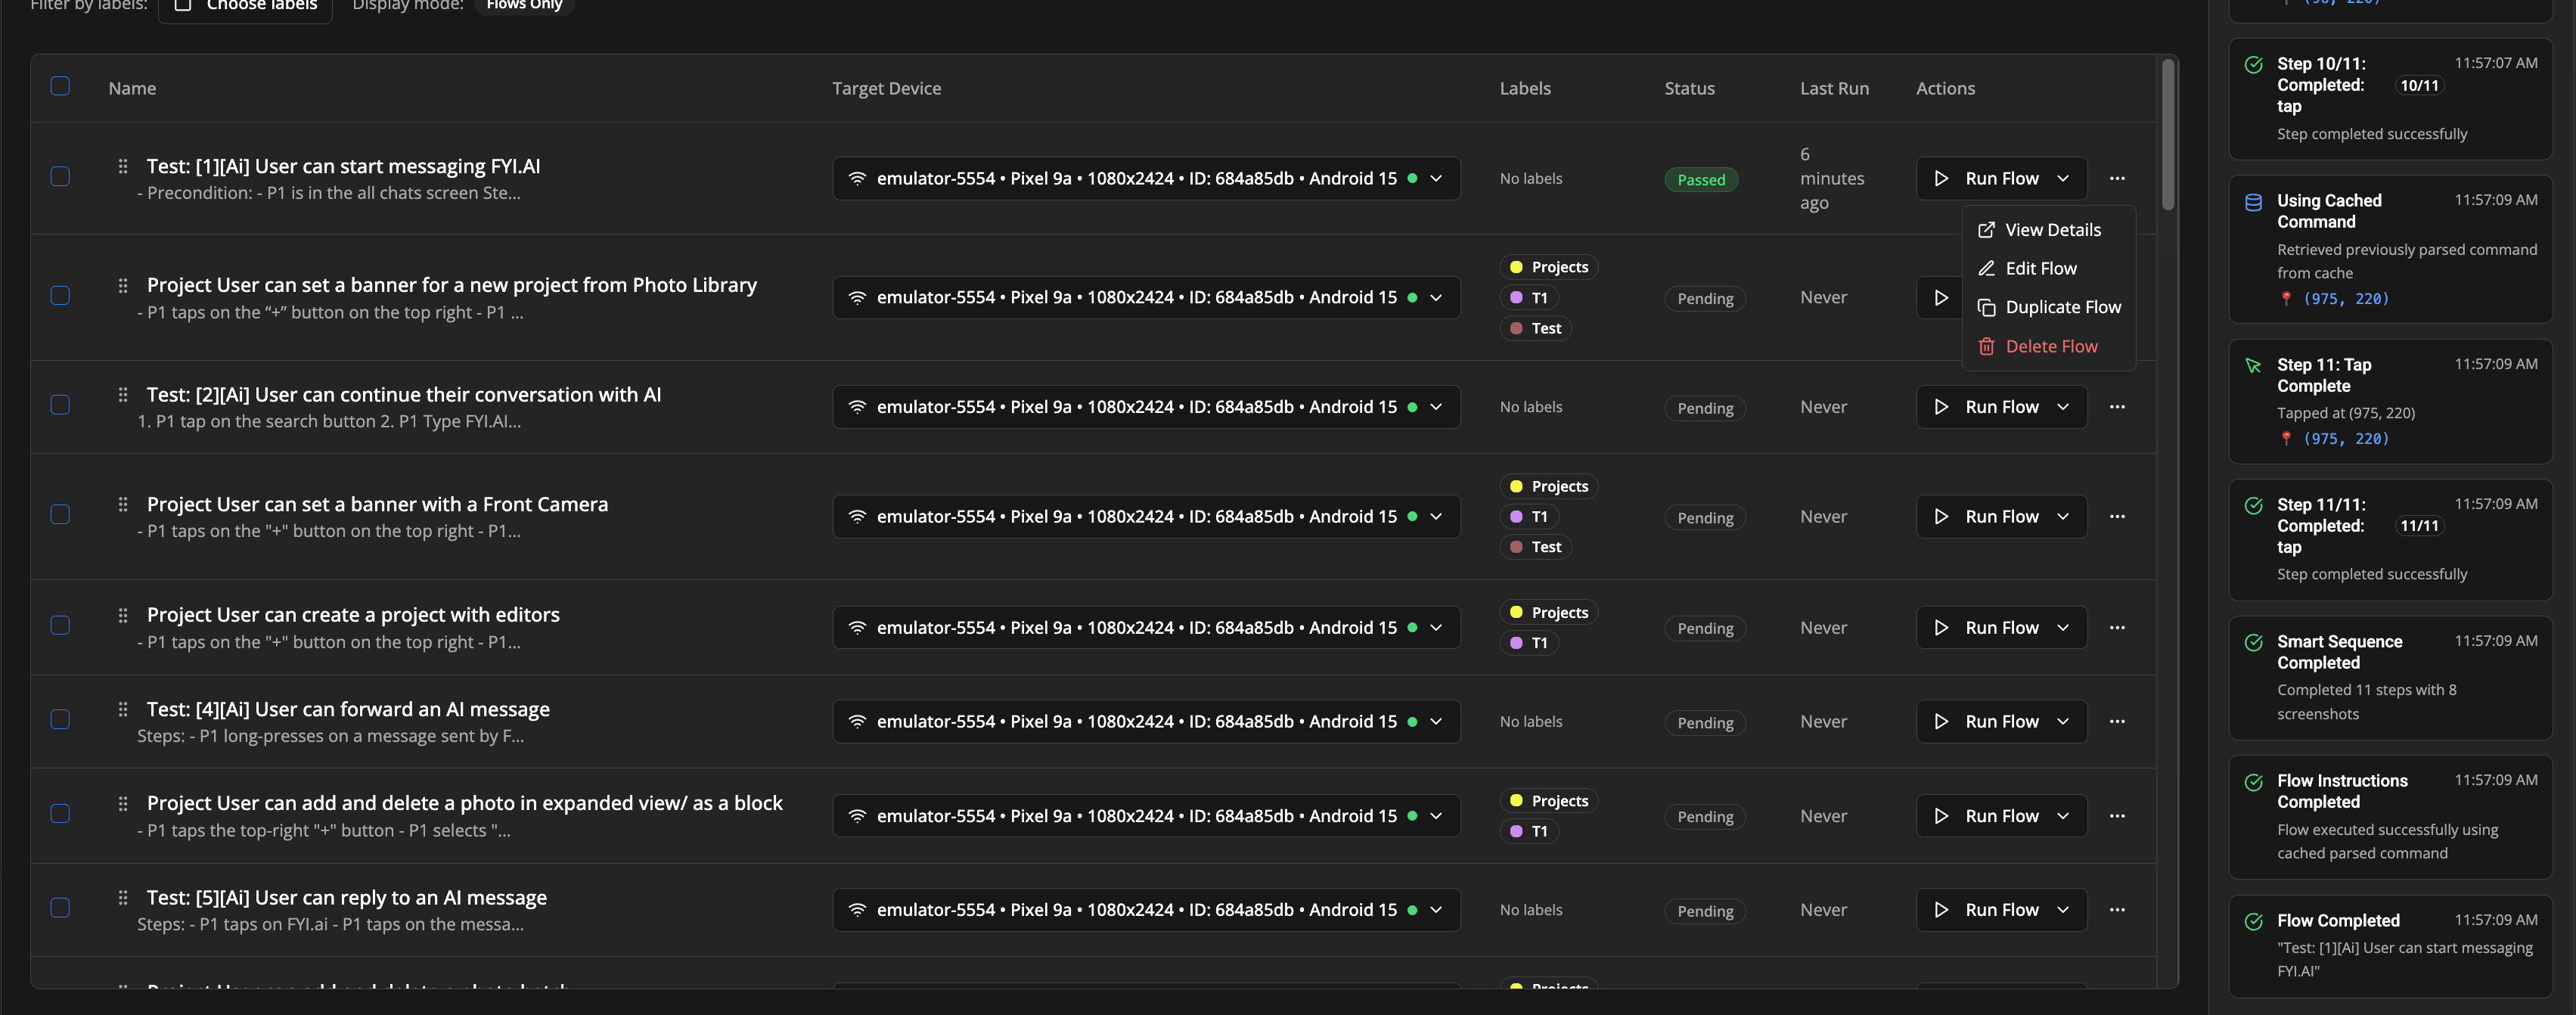
After Execution
After a flow completes:
- The status will update to show success/failure
- The "Last Run" timestamp will be updated
- You can view detailed results by clicking on the flow name or using "View Details"
Previous: Introduction | Next: Supported Steps